Getting Started
This guide takes you from installation to your first terminal and your first AI agent session. It's enough to start working; details of each feature live in the rest of the manual series (see the Manuals Overview).
1. What is VelaTerm
In one sentence: a terminal manager built for the AI-agent era. It organizes scattered terminal sessions into a project → group → session tree, and treats coding agents like Claude Code and Codex as first-class citizens — you can see in real time whether they're working, asking for input, or done, and reopening a session automatically resumes its conversation. Add browser remote access and SSH remote development, and you can take over your sessions from anywhere.
2. Installation
Grab the package for your platform from the download page:
| Platform | Package | Notes |
|---|---|---|
| macOS | .dmg (separate Apple Silicon / Intel builds) | Open and drag VelaTerm into Applications; the app is notarized, so it opens without security workarounds |
| Windows | -setup.exe installer, in min / full variants | full (~360MB) bundles a complete Git Bash and works out of the box; min (~25MB) is small and downloads missing commands on demand. Both install to the same location — pick one |
| Linux | .AppImage (x86_64 / aarch64) | Make it executable and run; no installation needed |
The app checks for updates automatically (there's also a "Check for Updates…" menu item), so it stays current with the release channel.
3. First launch: import a project
On first launch the window is empty and the left sidebar prompts you to import a directory. Click the folder button at the top of the sidebar (or press ⌘O) and pick a directory you're working in — it becomes the first "project" in the tree. You can also use "Clone from Git" to create a project straight from a repository URL.
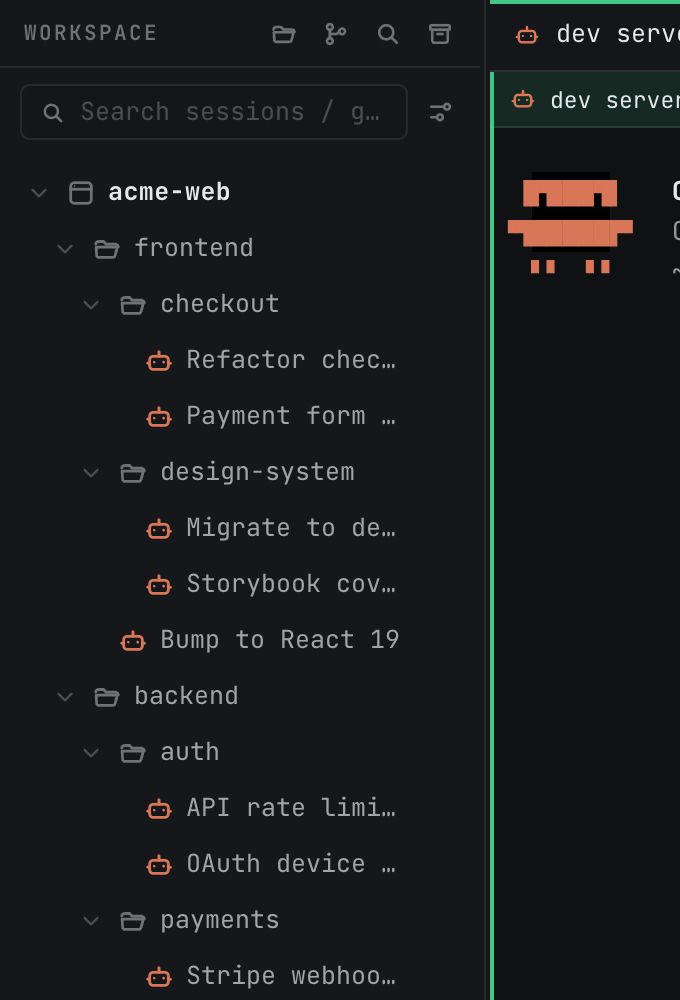
Once a project is in, you can create groups under it (nested arbitrarily deep — e.g. frontend / backend / testing), with sessions inside. The tree looks like this:
4. Open your first terminal
Any of the three:
- Press ⌘T (Ctrl+Alt+T on Windows/Linux) — you instantly get a scratch terminal tab. Terminals are always drafts: they live in the center pane only, never join the tree, and are discarded when closed, which is what makes them handy for quick commands.
- Hover a project, group, or session row in the sidebar and click the + button → "New Terminal Session". You get the same kind of draft, except it starts in that node's working directory. The group context menu carries the same entry.
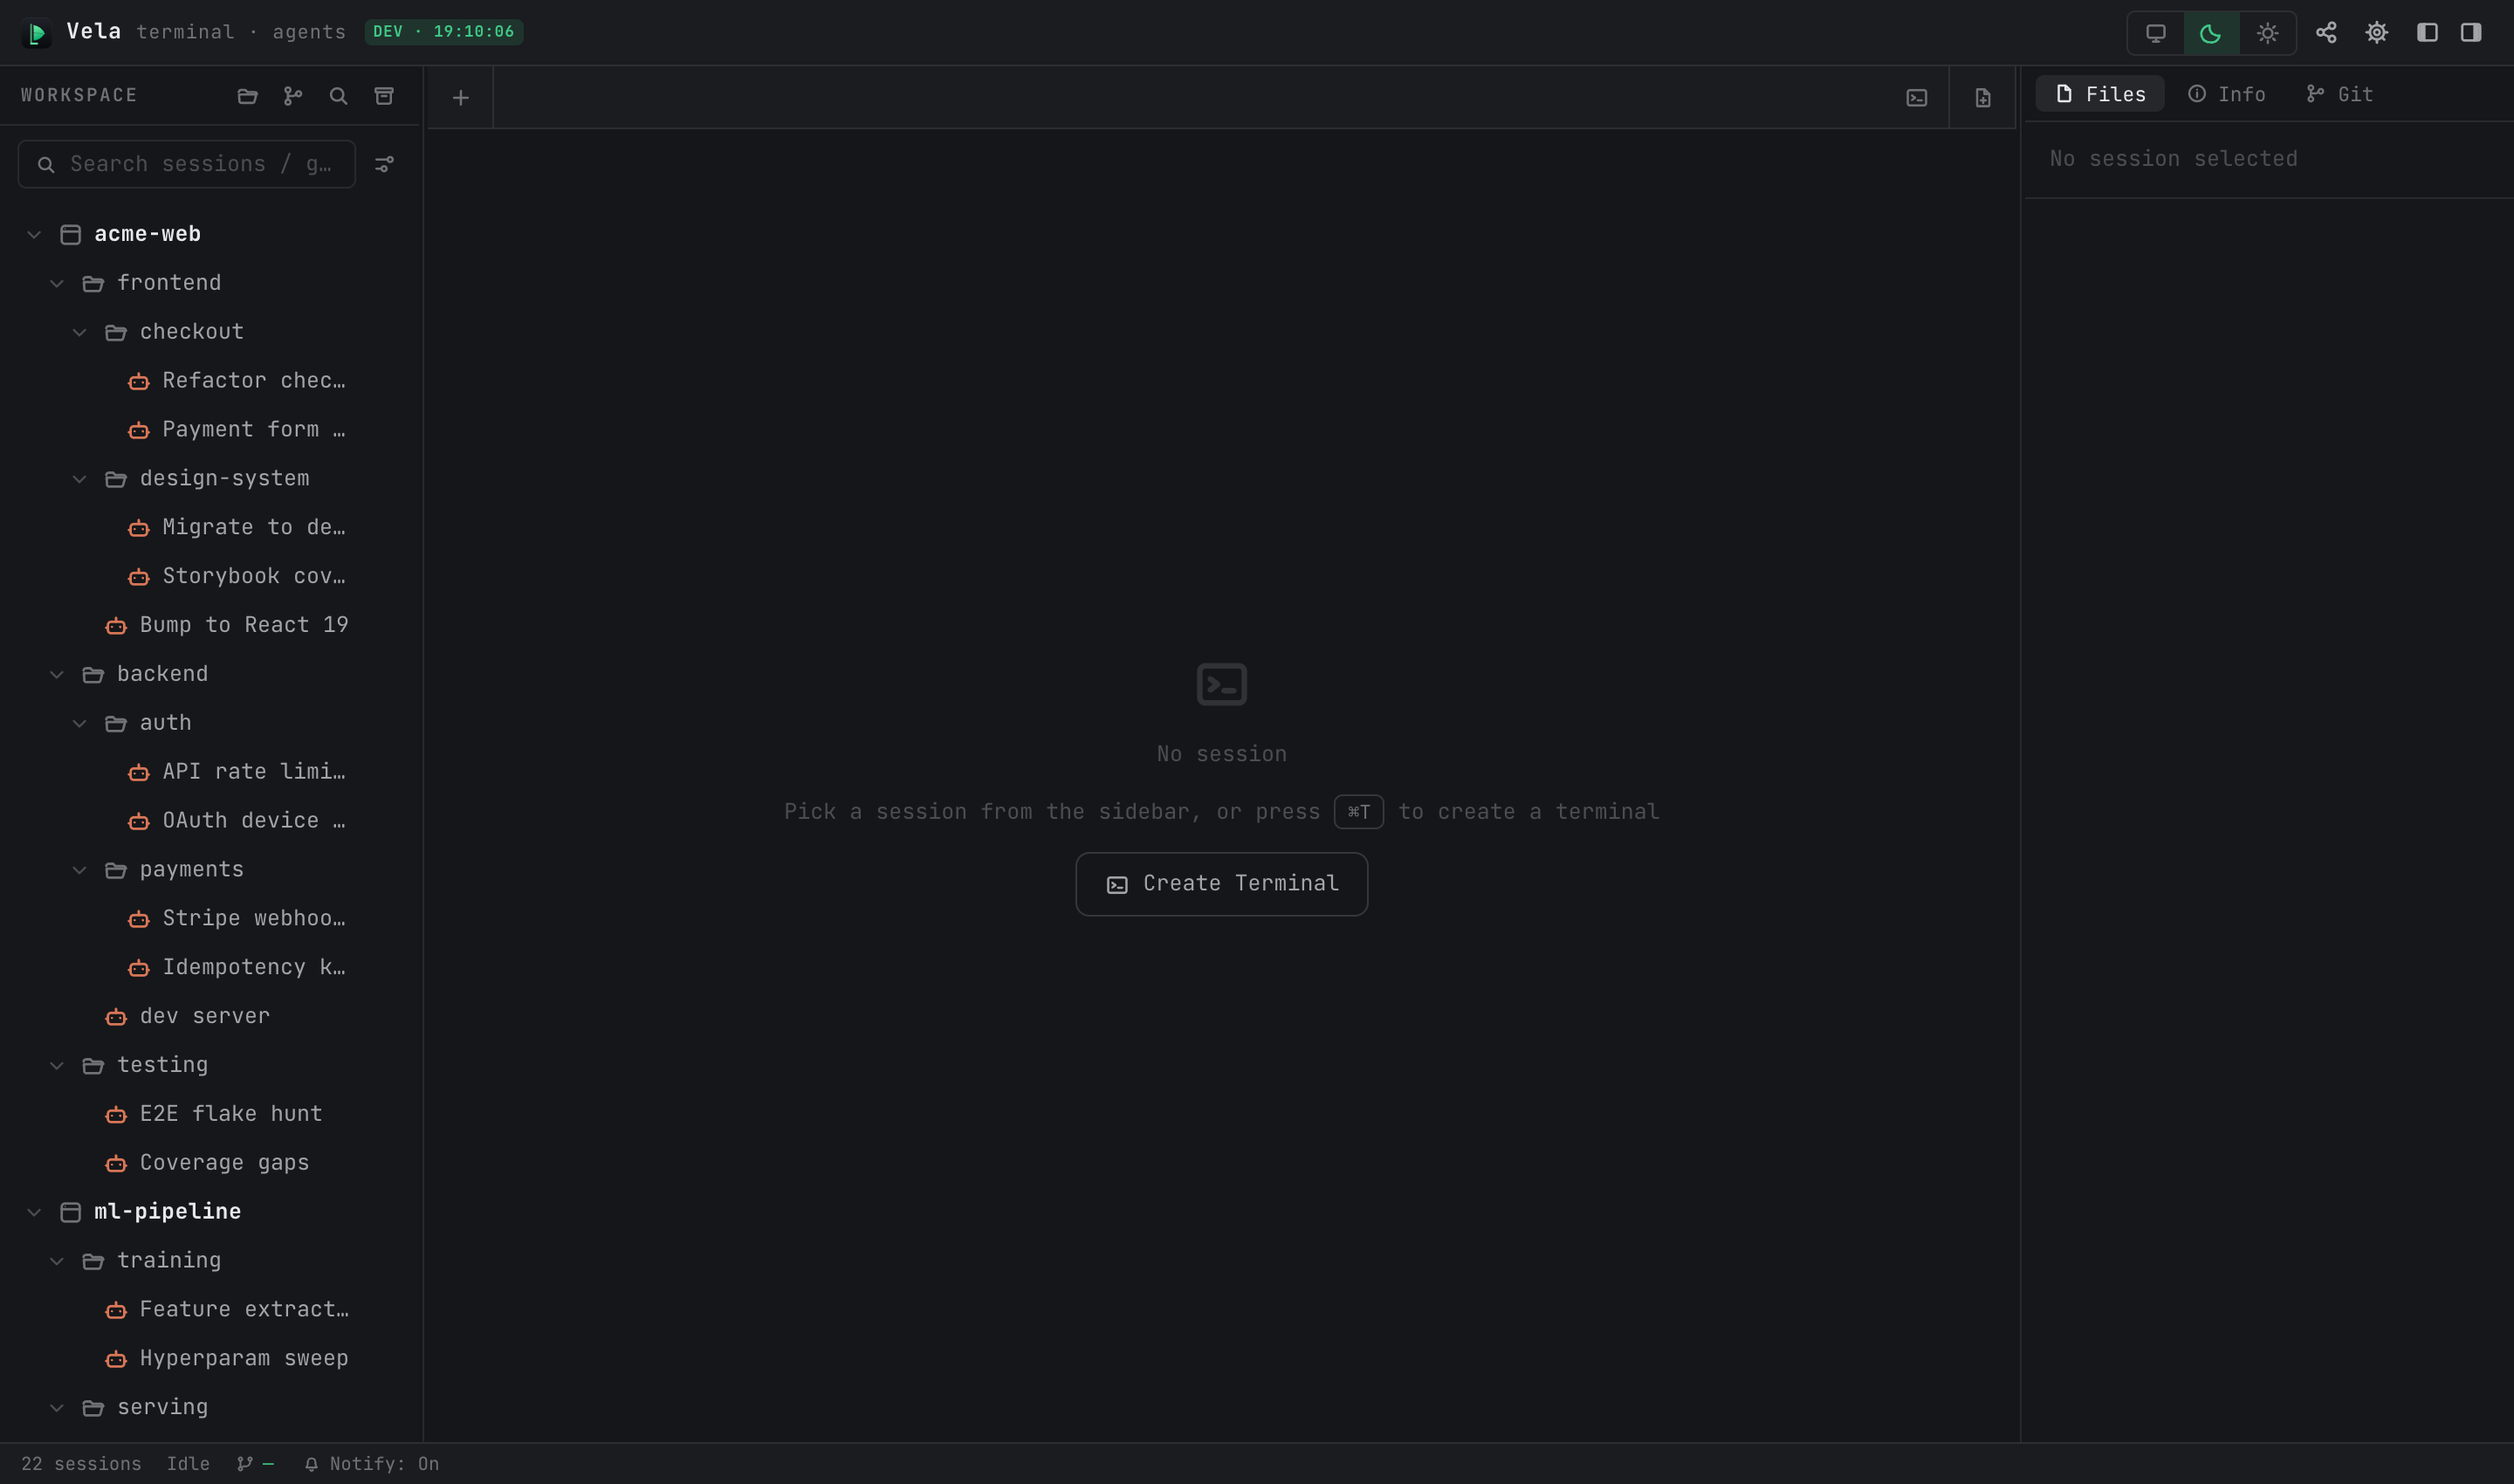
- When the center pane is empty, just click the "Create Terminal" button.
5. Open your first AI agent session
Right-click a project or group → "New Claude Session" (the menu also offers Codex and the rest under "More Agent Session"). VelaTerm launches Claude Code in that project's directory and automatically injects its status-reporting hooks:
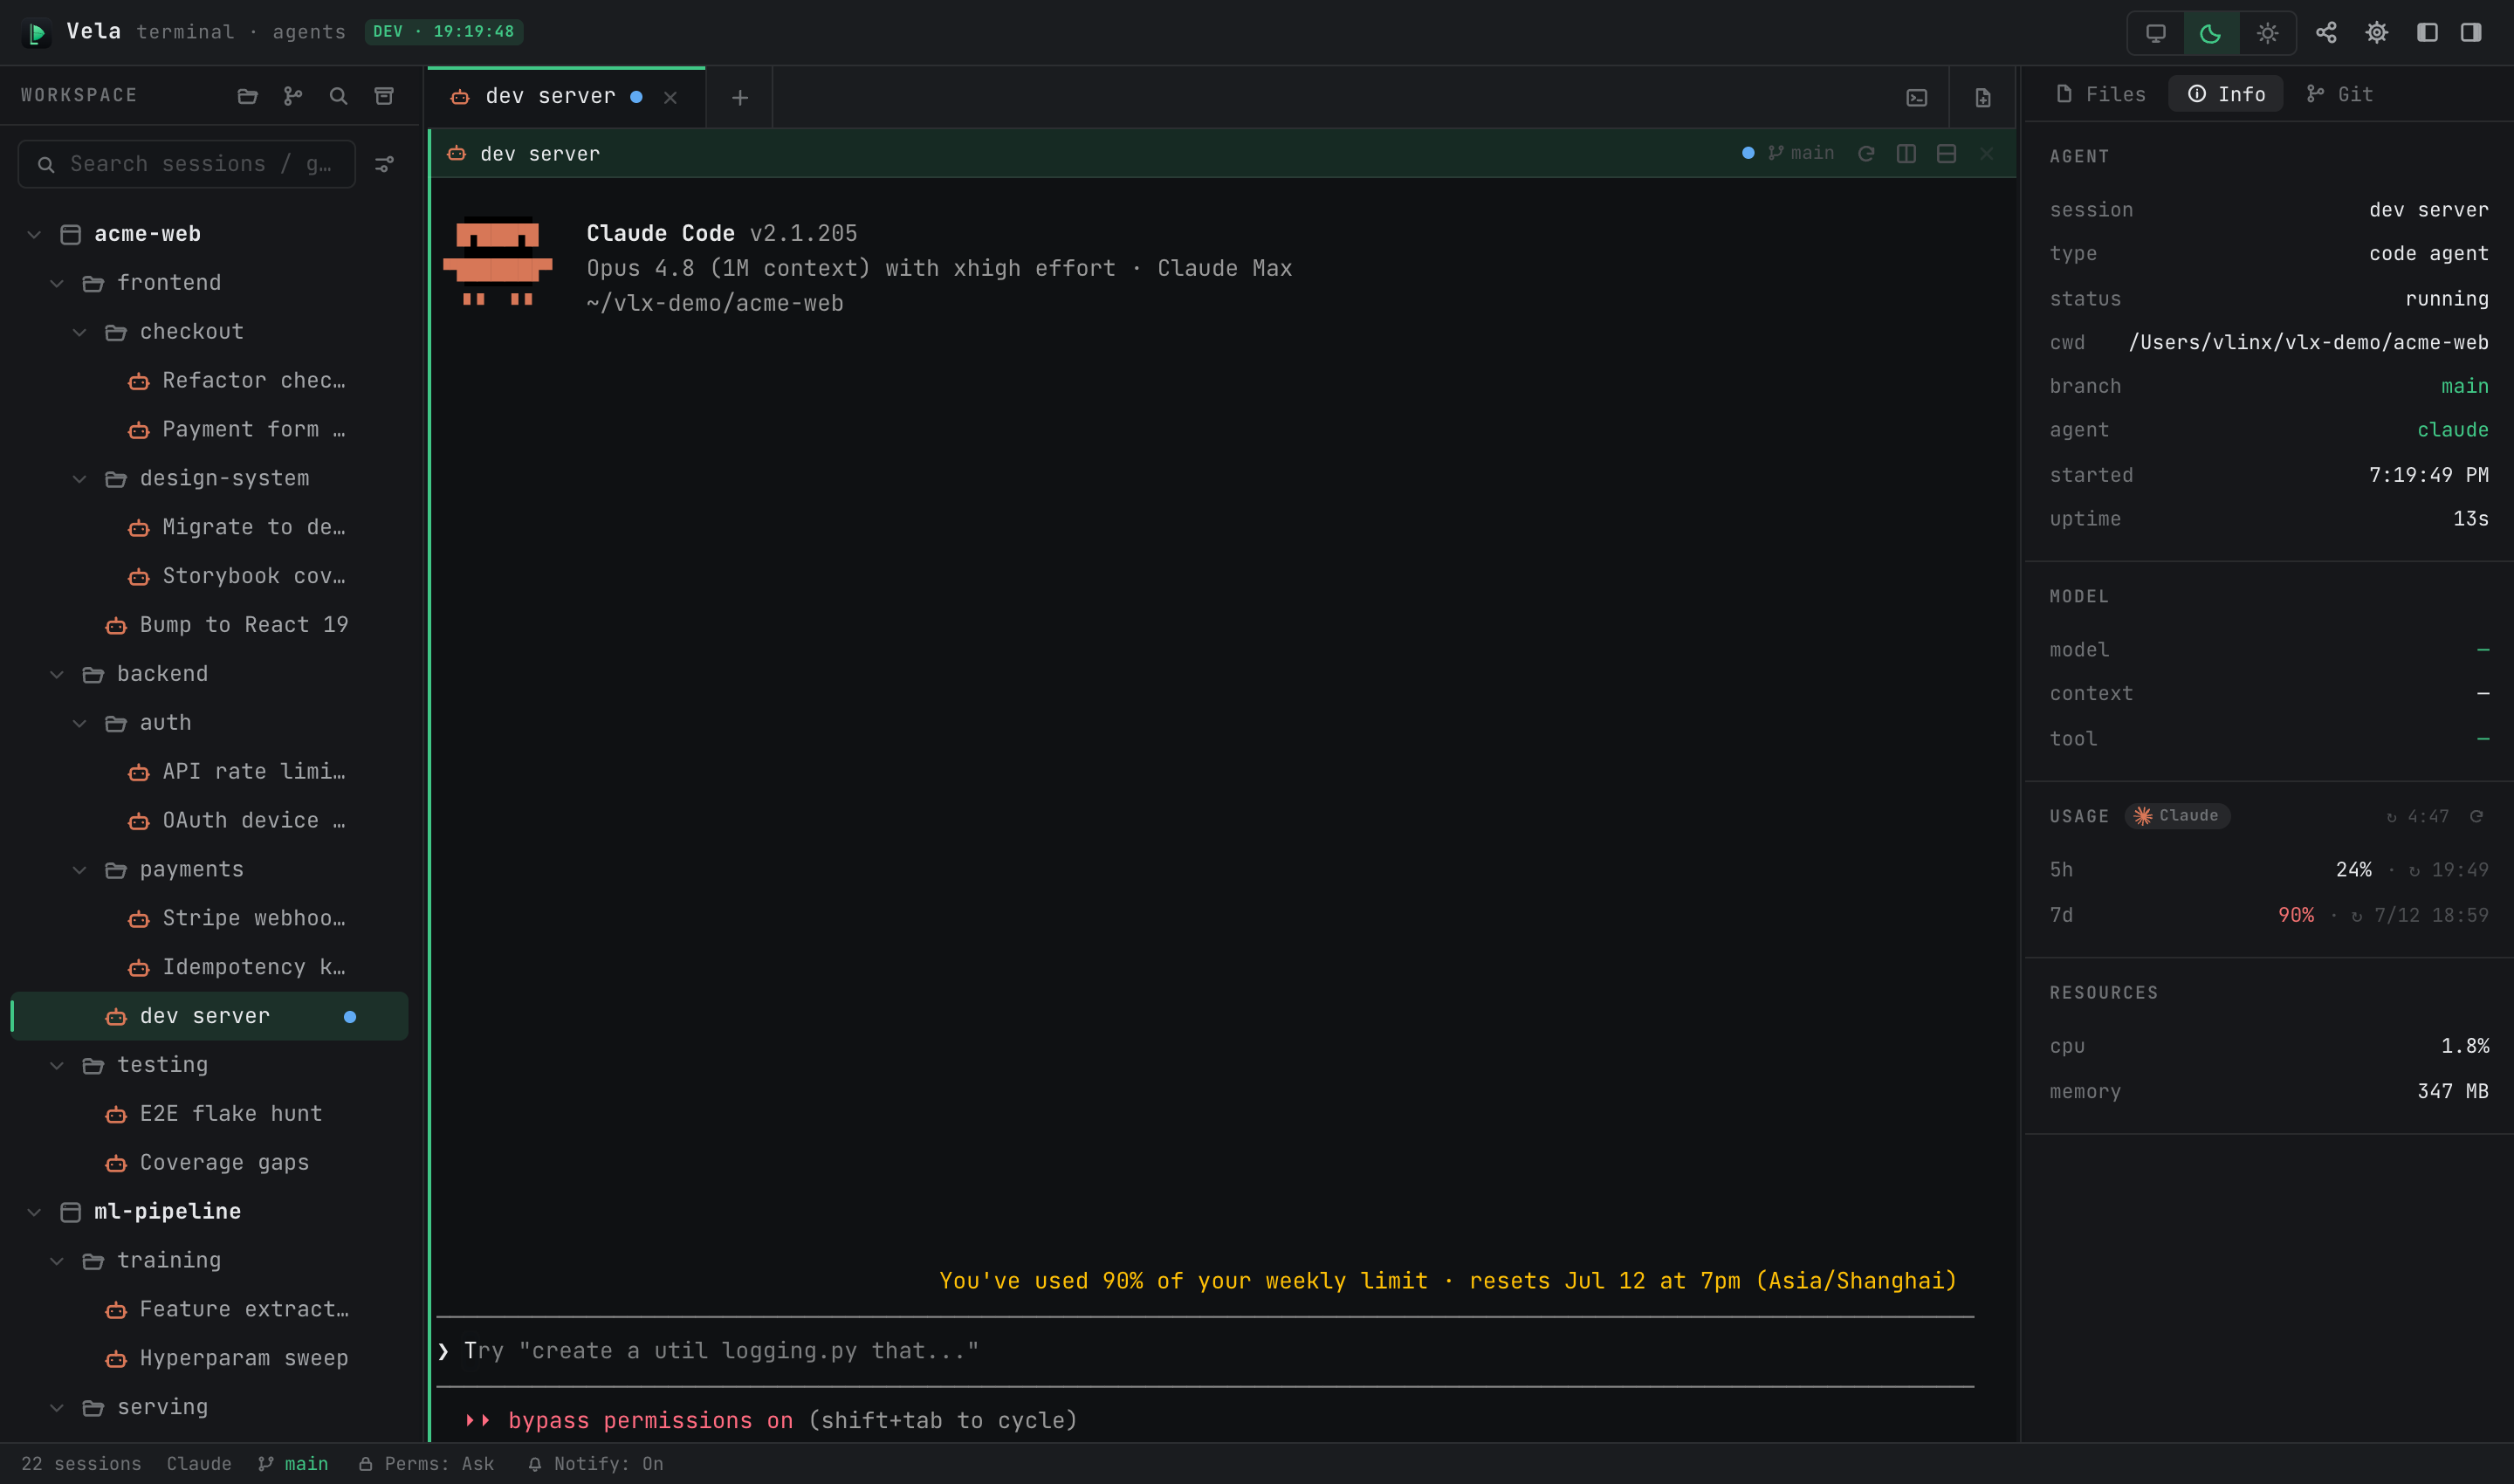
From that moment you get three things:
- Status dots: the small dot next to the session in the sidebar reflects the agent's state in real time — green means working, yellow means it needs you (a question or a permission prompt), magenta means it has replied and you've seen it. No more clicking through windows to check.
- System notifications: when the agent stops and waits for your input or confirmation, you get a system notification; when you're already looking at the session, it stays quiet.
- Auto-resume: close the tab — or quit the whole app — and the next time you open that session node, the conversation picks up right where it left off. Want a brand-new conversation? Create a new session node.
This assumes the corresponding CLI is installed. If it isn't, you won't hit a dead end: an install-guide card appears in the session with the recommended install command for your platform, a one-click install, and a retry button.
6. UI tour
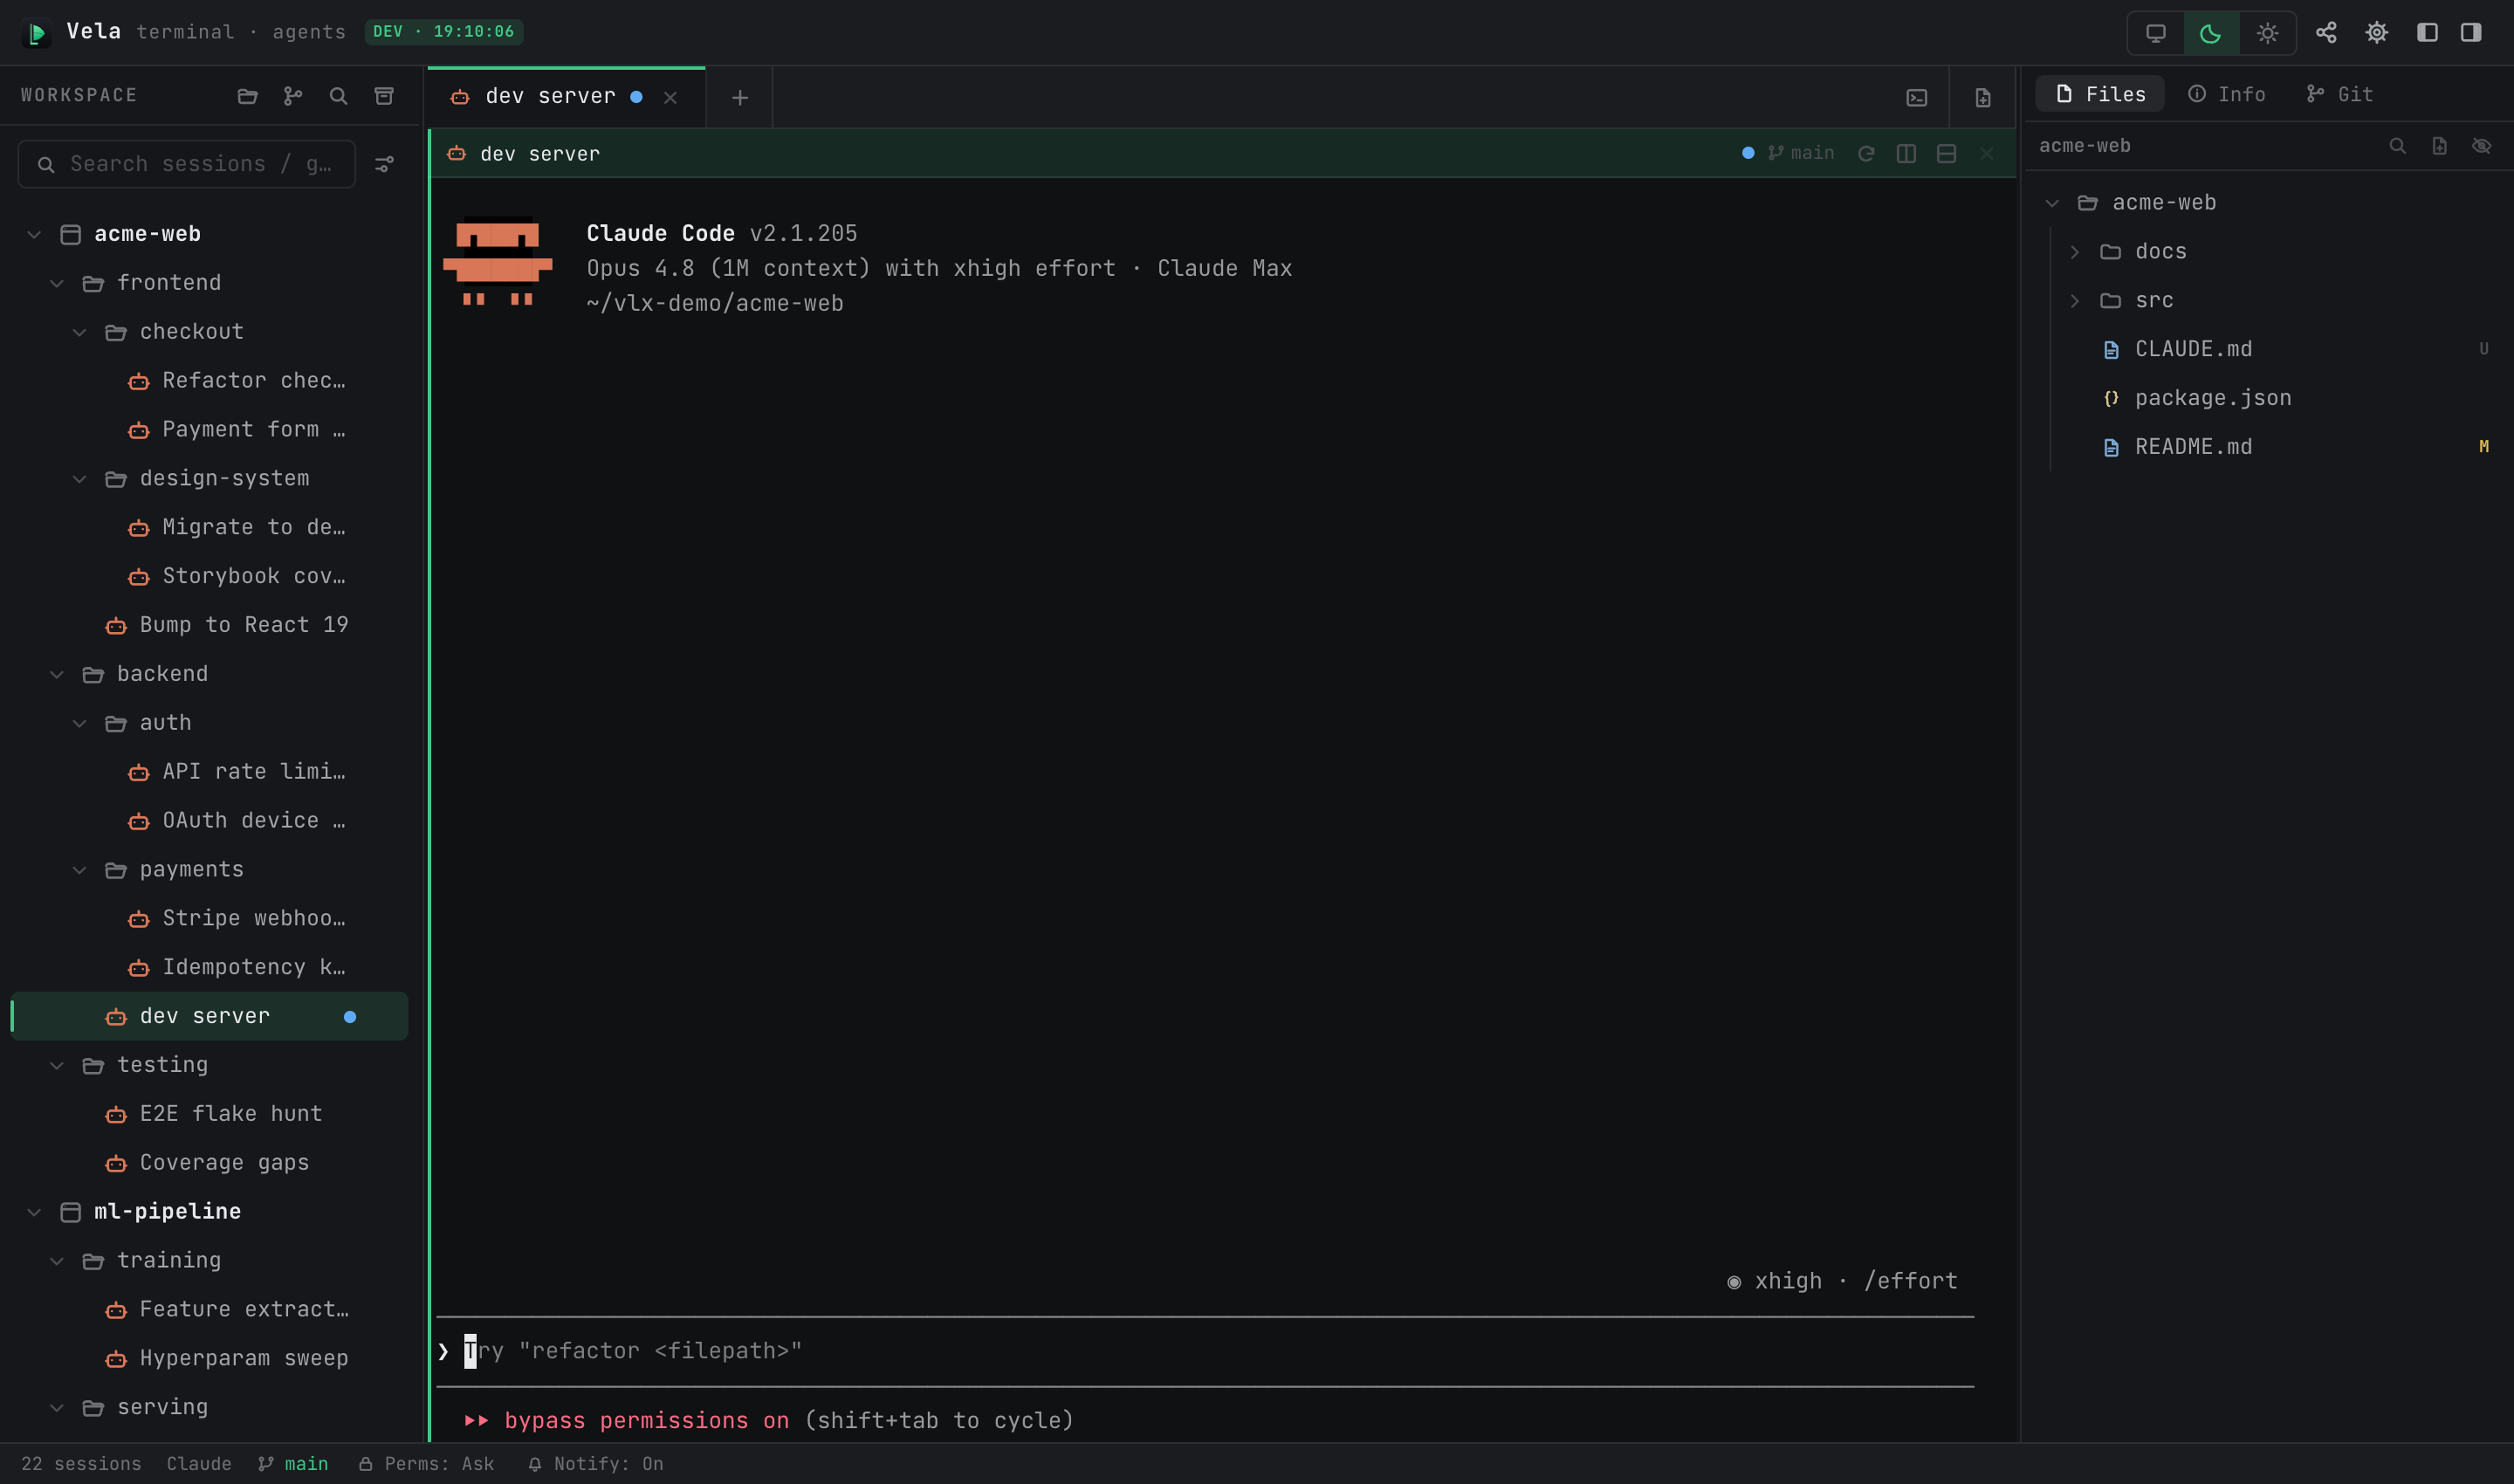
- Left sidebar: project tree + search box + four header buttons (import project, clone from Git, global search, archived sessions).
- Center pane: tab bar + terminal area. Tabs behave like a browser: clicking a session in the tree reuses the current tab by default; tabs you switch away from keep running in the background; closing a tab is what actually ends the process. A tab can also be split into panes (⌘D right, ⌘⇧D down).
- Right panel: follows the current session, with three tabs — Files (file tree), Info (basics, model, usage, resource footprint), and Git (branch and changes).
- Status bar: session count, current session state, Git branch, notification toggle, and the global Working / Pending / Viewed counters — click one to filter the sidebar to sessions in that state.
- Title bar, right side: light/dark theme switch, Remote Access, Connect to Remote Server, Settings.
7. Where to go next
- The full story on trees and tabs (splits, archiving, global search, multi-select batch operations): Interface & Session Management.
- Terminal features (search, image paste, Windows shell selection): Terminal Usage.
- Agent capability differences, resume / fork / permission modes: AI Agent Sessions.
- Letting agents split subtasks into isolated worktrees and work in parallel: Session Spawning & Git Collaboration.
- Taking all of this with you on a phone or another machine: Remote Development & Management.